Hi Fridolin,
as reason of we have got several request regarding to the new STM32CubeIDE, I would like to answer here in general what’s to do to use STM32CubeIDE with our TrueSTUDIO preconfigured project.
Unfortunately the import function build in in the new STM32CubeIDE, changes some rudimentary things in our Embedded Wizard project made for TrueSTUDIO. To use our Embedded Wizard eclipse project with STM32CubeIDE, please do the following steps.
This guide is very detailed. Depending of the experience level, it could be that one or several steps are self-explained and able to skip. It isn’t rocket science, even when a lot of steps are necessary :-P
I have made this guide for STM32CubeIDE v1.0.0, Embedded Wizard 9.20 and STM32F746-Discovery. The steps are the same for all ST boards, maybe with some slightly differences like the MCU selection or path and library names. If you have any trouble following the steps with another ST board, please ask the question here in this thread.
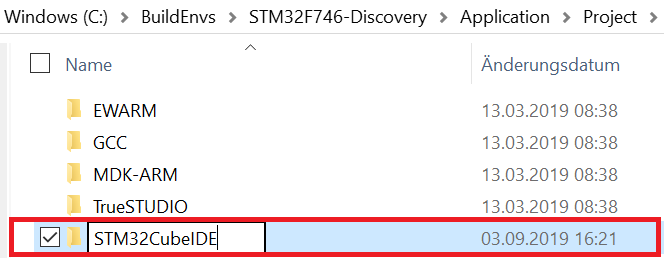
1. Please download a new Build Environment for your ST board and create a folder under ‘<Board Name>/Application/Project’ and rename it to ‘STM32CubeIDE’.
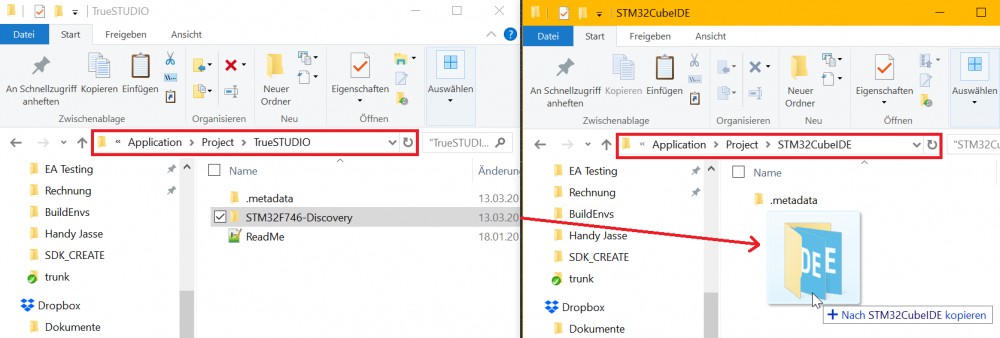
2. Copy the folder ‘<Board Name>’ from ‘<Board Name>/Application/Project/TrueSTUDIO’ into ‘<Board Name>/Application/Project/STM32CubeIDE’.
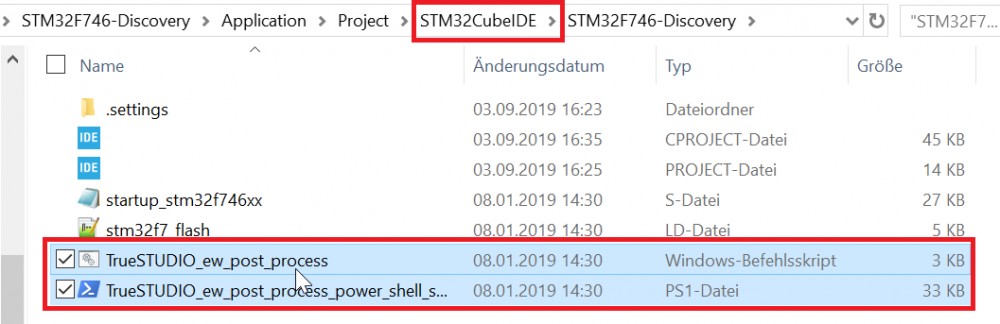
3. Go into ‘<Board Name>/Application/Project/STM32CubeIDE’ and delete ‘TrueSTUDIO_ew_post_process.cmd’ and ‘TrueSTUDIO_ew_post_process_power_shell_script.ps1’. The post process that mentioned in the Getting started articles is not able to use with STM32CubeIDE. That what this post process does, is also easy to set up manually. How that works is descripted later in this thread.
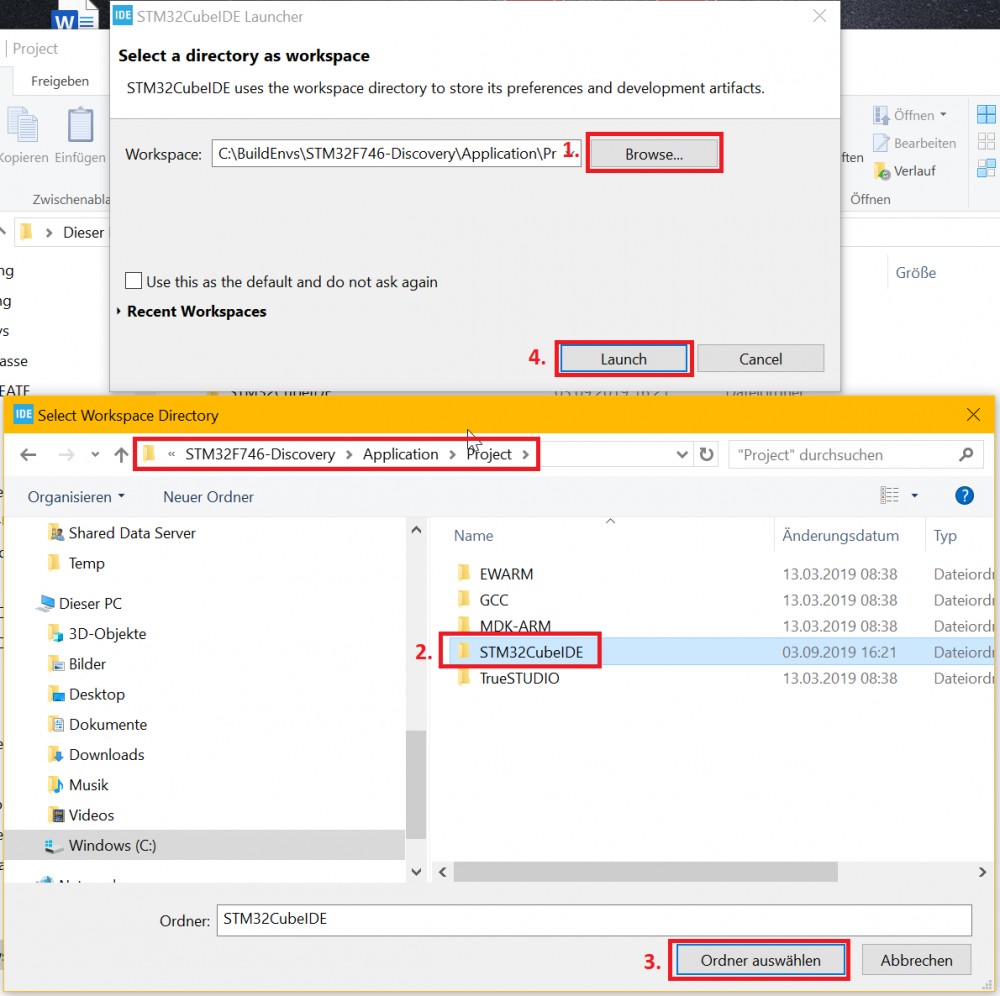
4. Now open your STM32CubeIDE v1.0.0 and select the created folder as workspace.
5. Then start the import function located under ‘File->Import’.
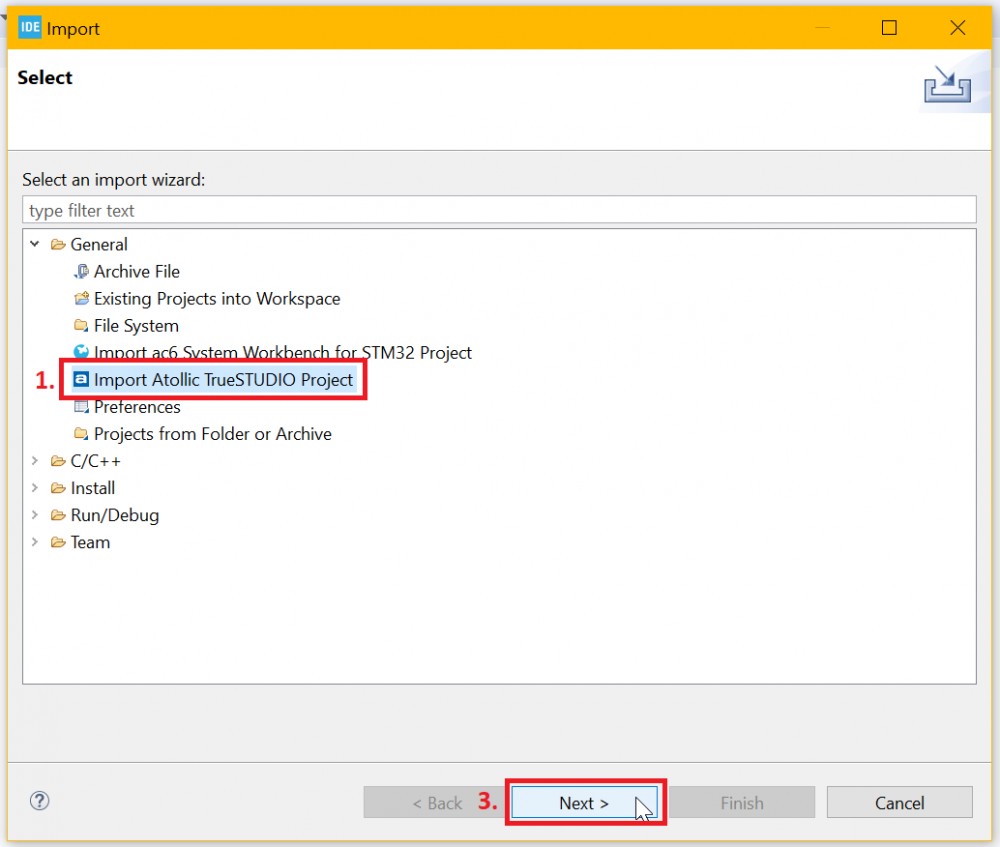
6. Nevertheless that the import function will effect that the project cannot build, please select ‘Import Atollic TrueSTUDIO Project’ and press ‘Next’.

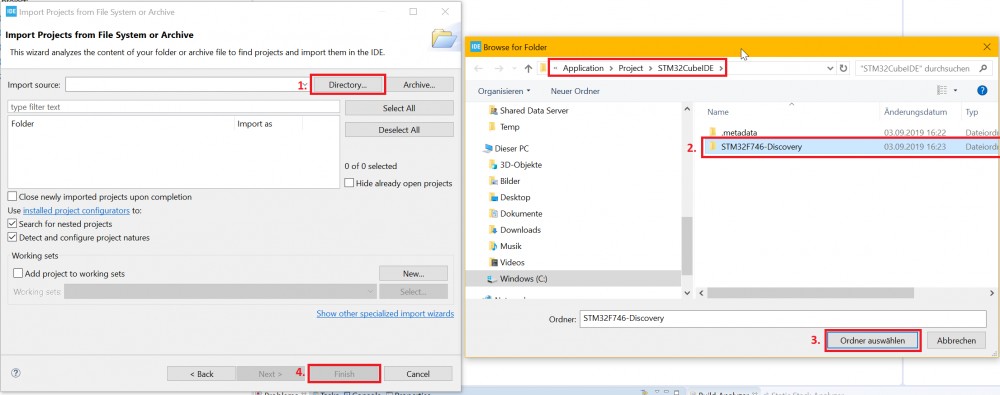
7. Select ‘<Board Name>/Application/Project/STM32CubeIDE/<Board Name>’ with the ’Directory…‘ function and press ‘Finish’.
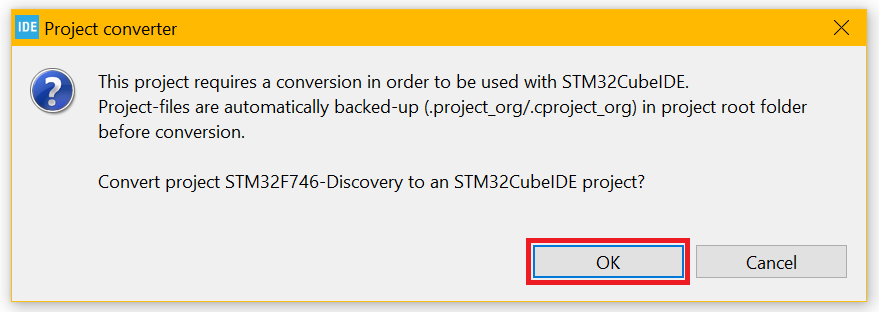
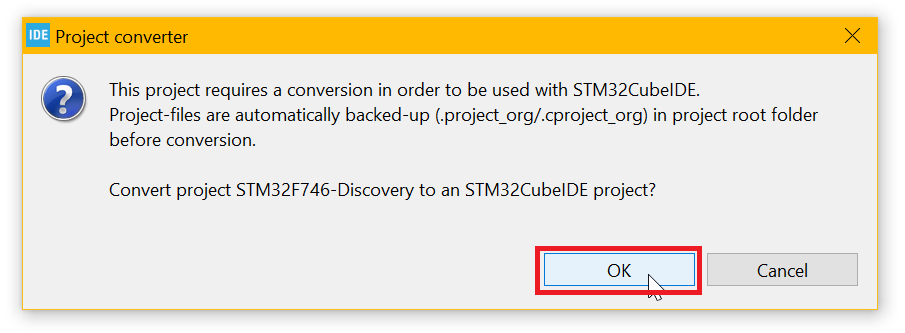
8. Press ‘OK’.
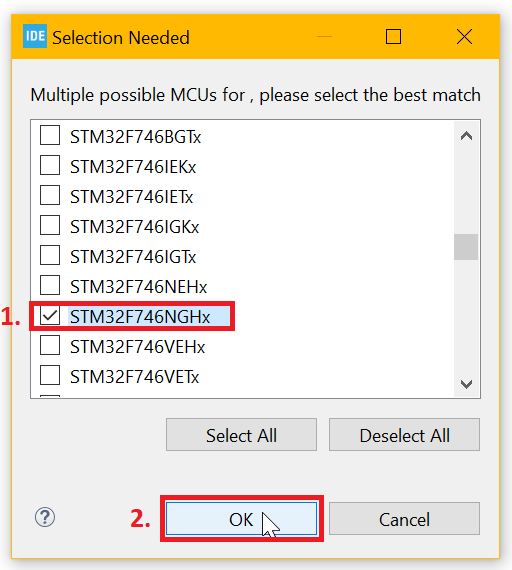
9. STM32CubeIDE needs to know exactly the MCU that is mounted on your board. Therefore please use the related product reference that can be found on ST’s homepage. Normally you have to select just one MCU. Please ensure that this selection is correct, otherwise the project could build correctly but the flash process will not do what it should. If this is done, then press ‘OK’.
10. Press ‘OK’.
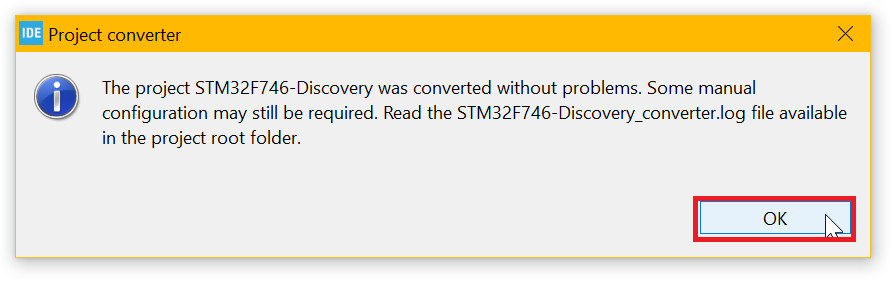
11. Press ‘OK’ again.
12. And press it ‘OK’ again.
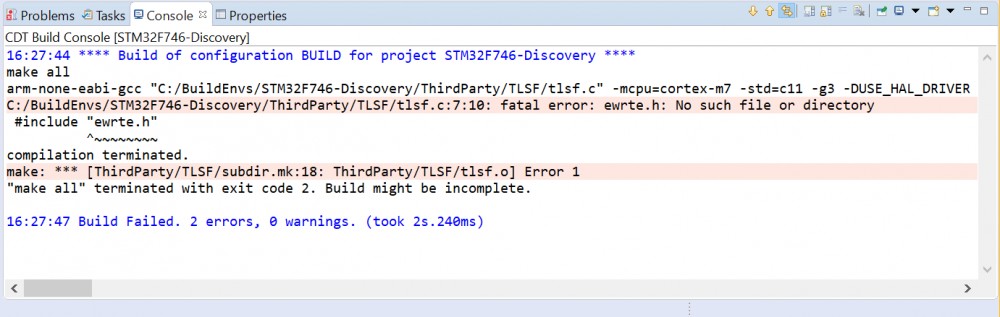
13. If you try to build the project with ‘Build->Build Project’ you will get this error. This means that the Embedded Wizard automatically generated code is not present.
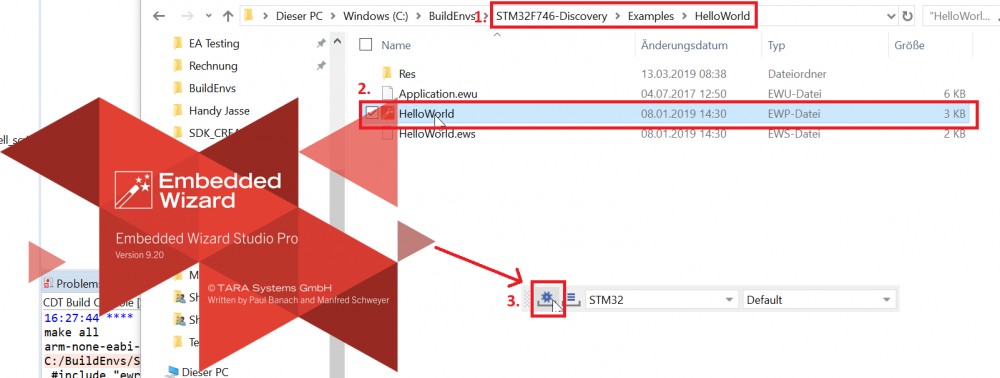
14. That’s easy to solve. Just go into any example like ‘<Board Name>/Examples/HelloWorld’ and generate the UI code with Embedded Wizard Studio (3.).
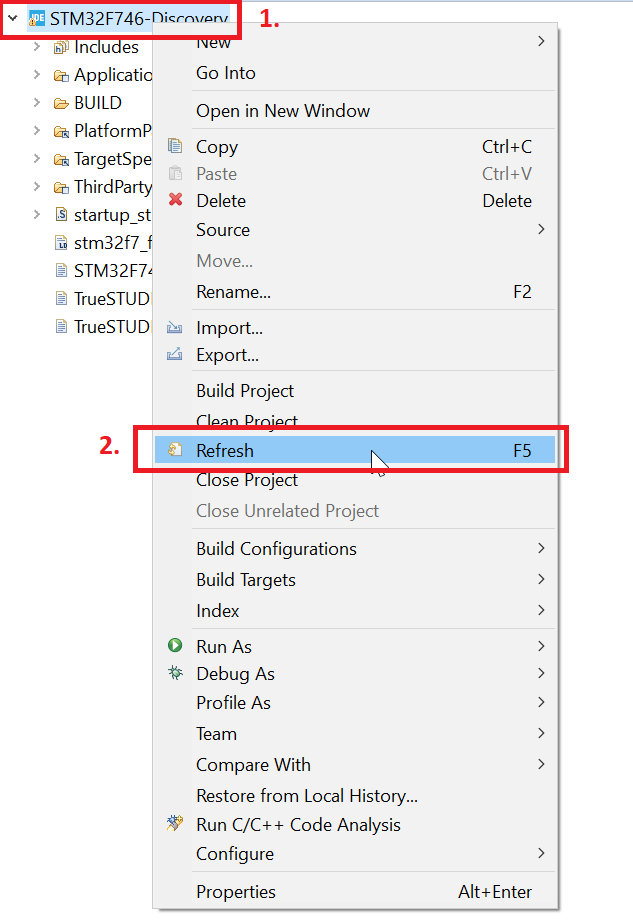
15. Please refresh the project explorer by pressing ‘Right click on the project->Refresh’.
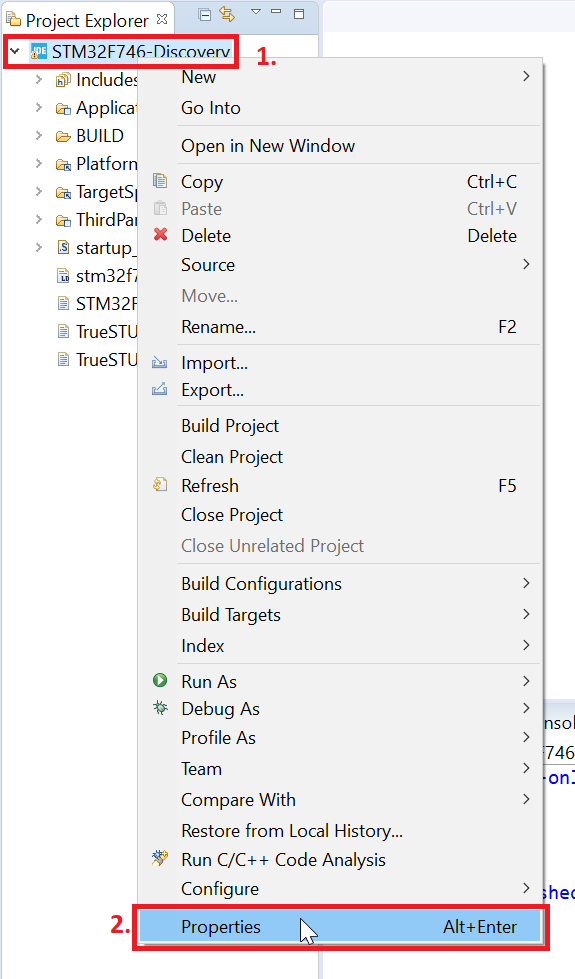
16. Then go into the project properties by pressing ‘Right click on the project->Properties’.
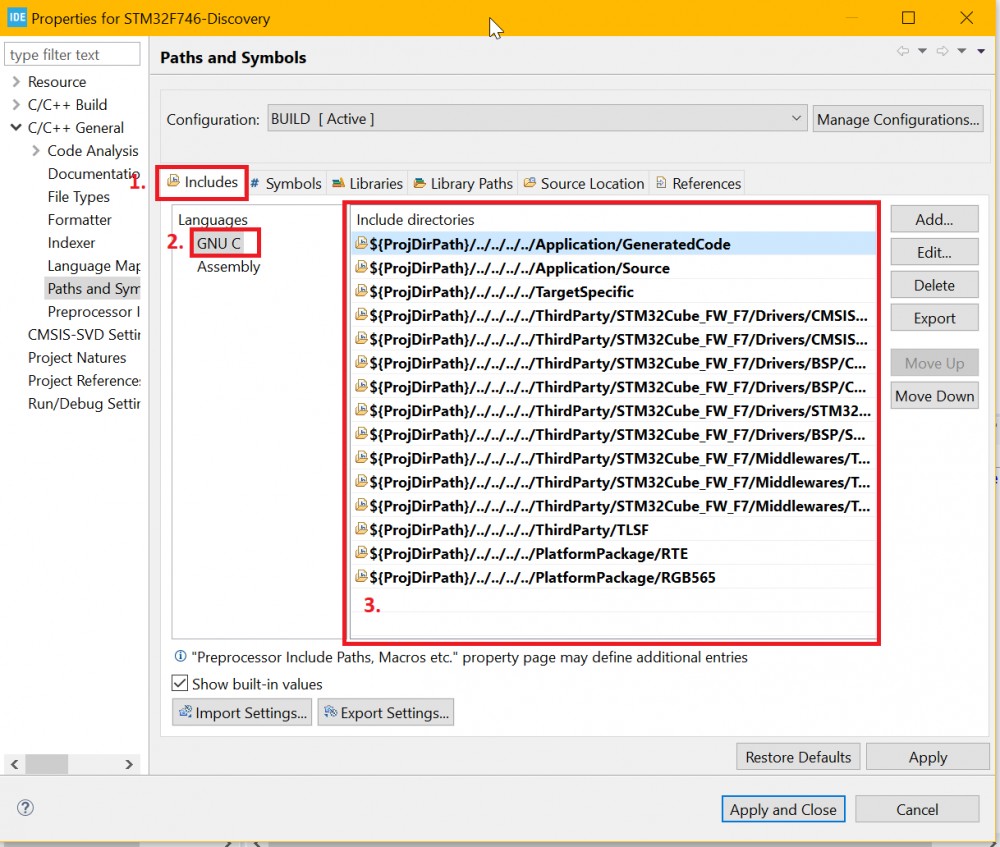
17. Switch to the ‘Include’ tab that is located under ‘C/C++ General->Paths and Symbols->Includes’. And here you can see why the project cannot build correctly. The import function changes the paths that we have defined in ‘Includes’ and ‘Library Paths’. On the left side the paths after the import in STM32CubeIDE are shown and on the right side how it looks within Atollic TrueSTUDIO.
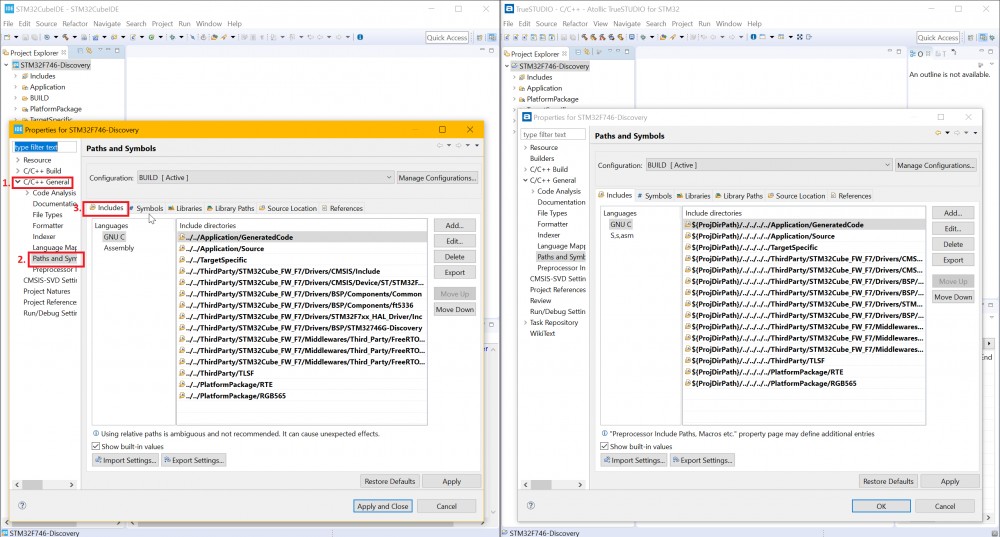
18. So, use the ‘Edit…’ button to correct the paths, therefore replace ‘../../’ with ‘${ProjDirPath}/../../../../’.
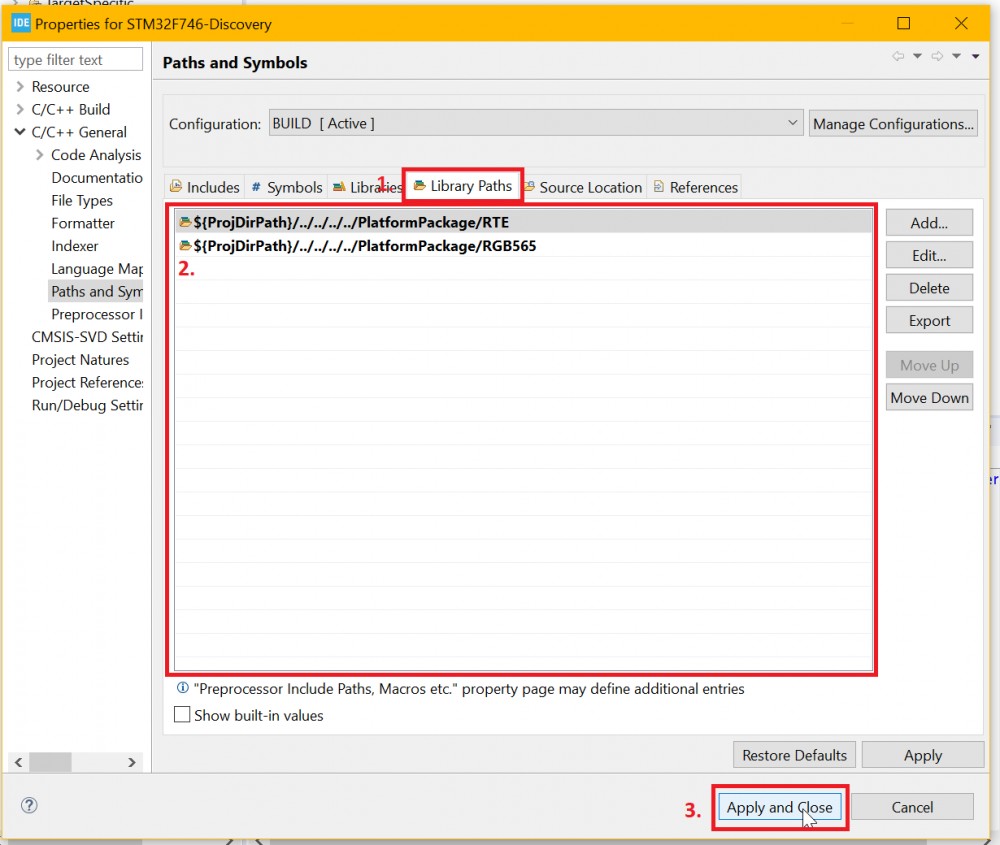
19. Do the same as in step before with the ‘Library Paths’ any press ‘Apply and Close’.
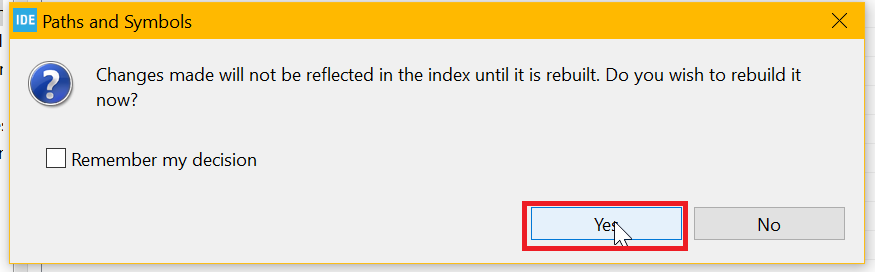
20. Press ‘Yes’.
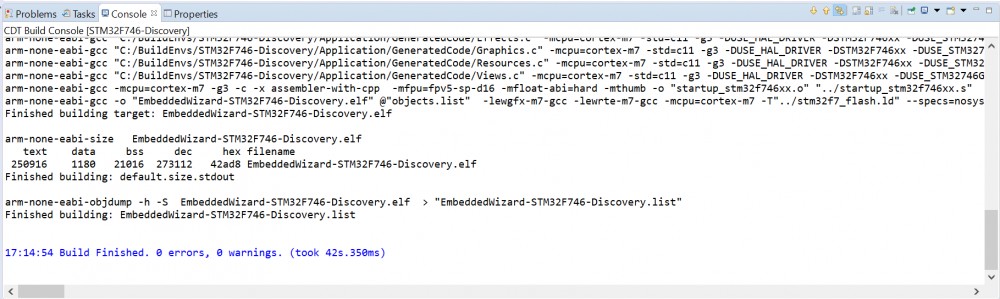
21. If this is done, normally the project should build as usual with ‘Build->Build Project’. To do a project refresh (step 15) before, is never wrong.
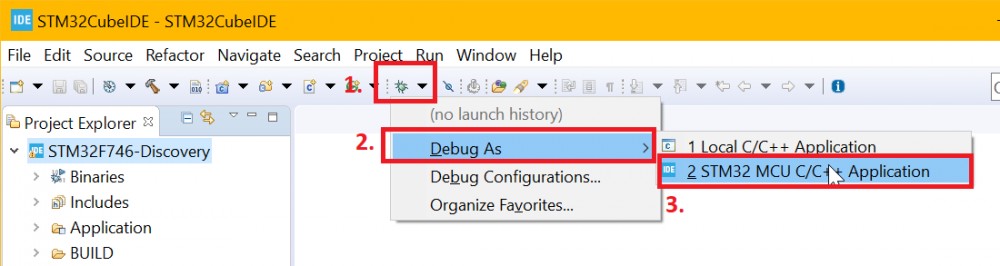
22. The new STM32CubeIDE has a really smart flash tool integrated that allows you to setup the flash process with just a few step. Thus, start by pressing the ‘Bug button->Debug As->2 STM32 MCU C/C++ Application’.
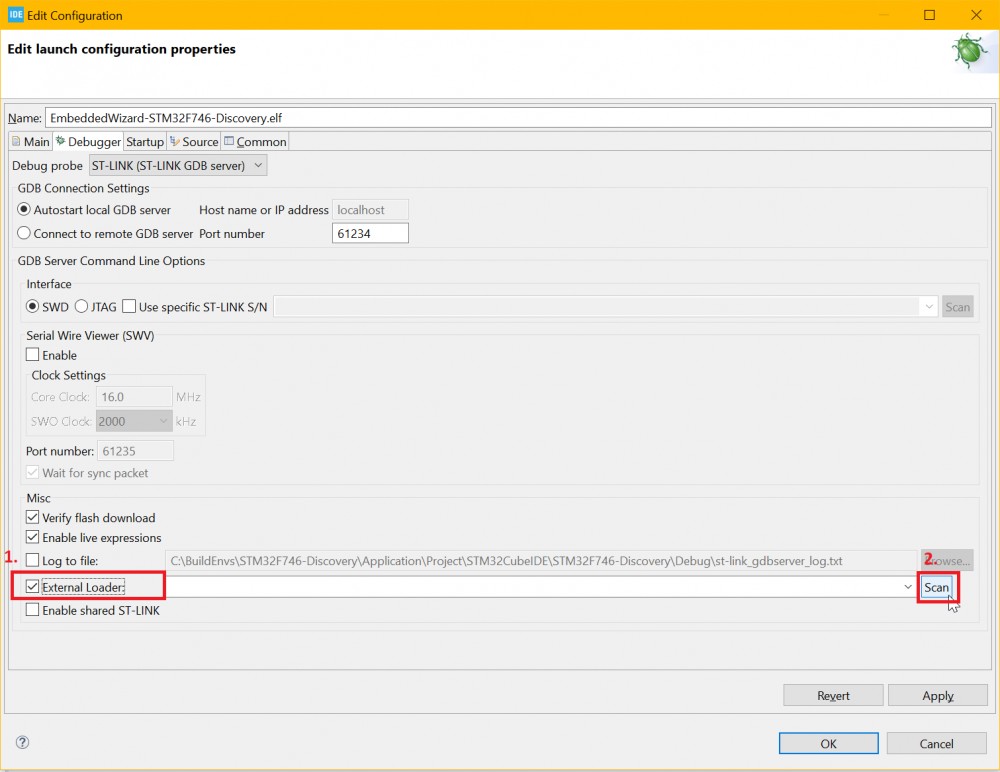
23. In the window that then will appear, switch to the ‘Debugger’ tab.

24. Depending on the selected ST board, it could be necessary to activate the ‘External Loader’ by selecting the check box. Per default the flash loader selection beside the checkbox is empty. By pressing ‘Scan’ STM32CubeIDE searches for available external flash loaders within its file location.
Attention: Step 24 and 25 is only necessary if you use an external flash. Not all ST boards that we support do have an external flash mounted on it. To get know whether an external flash is supported, you can check the ‘Symbol Tab’ in the same menu as explained in step 15. If there is a define named with ‘EW_USE_EXTERNAL_FLASH’ then your board has one. If not, please skip the step the flash loader selection.

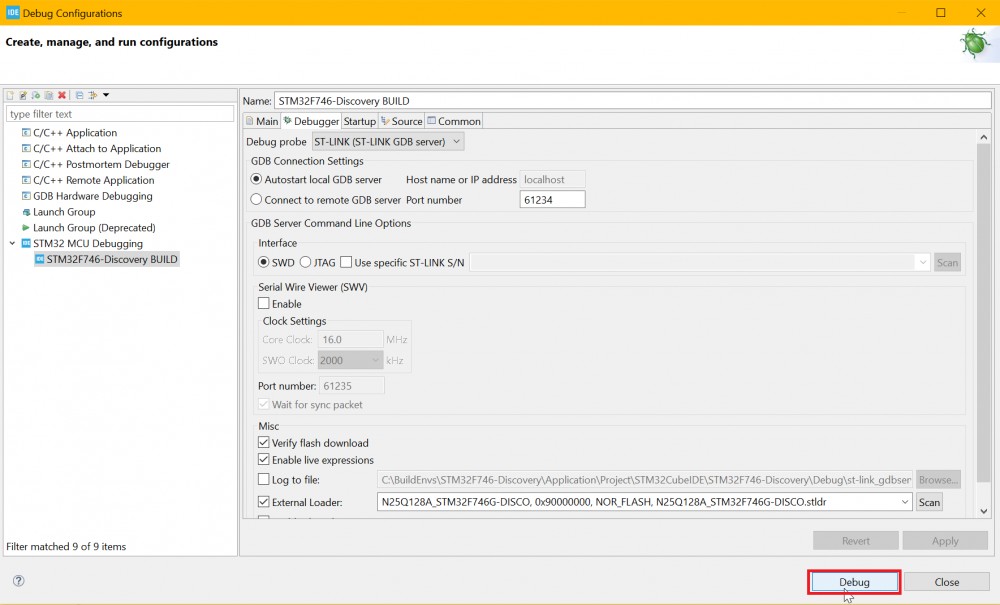
25. Otherwise please select the flash loader for your board. This information you easily can find in ‘<Board Name>/StartGccBuildEnvironment.bat’ behind the variable ‘ExternalLoader’. This batch file you can open with any text editor. Anyway, select the correct flash loader and press ‘Debug’. Ideal wise the application should start to flash know.
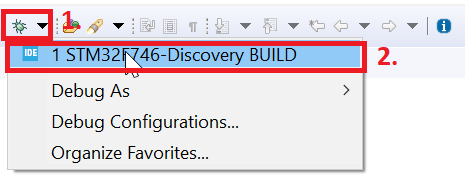
26. (Optional) To repeat the flash process without opening the dialogue you can use the ‘Launch history’ entry by pressing the ‘Bug button’. This selection will appear after you have flashed the board the first time like in step 25.
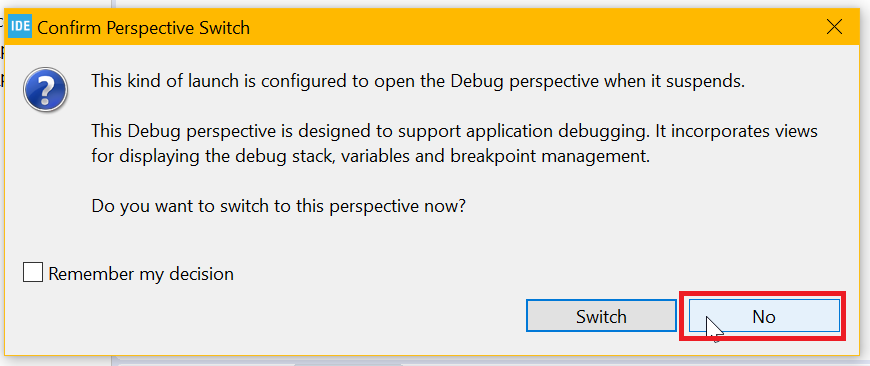
27. Press ‘No’ … or ‘Switch’, whatever you prefer after the flash process is finished.
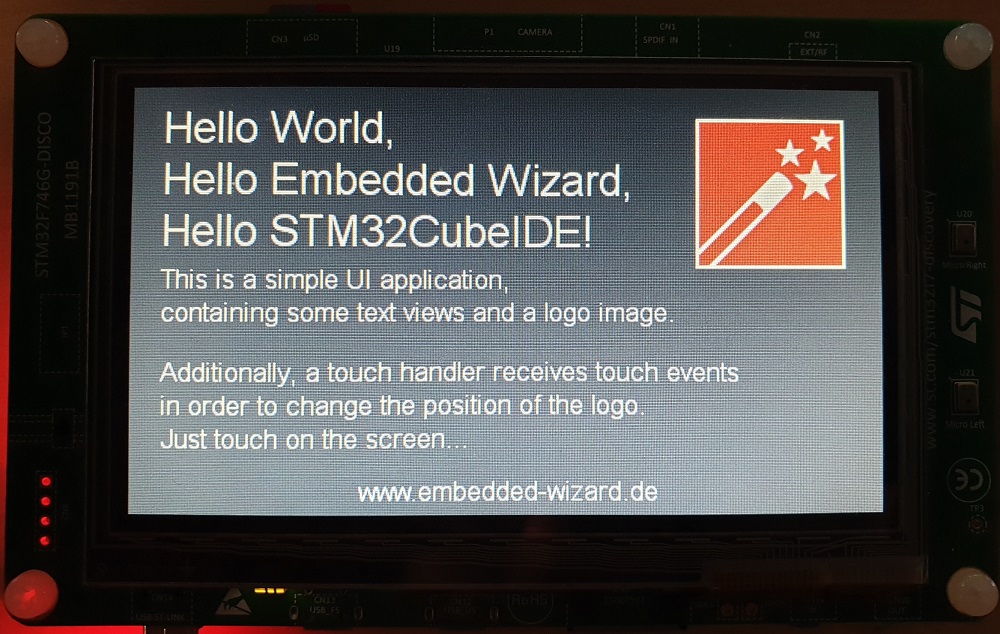
28. As last step you have to start the application by pressing the ‘Play’ button. Please ensure before that the flash process was successfully.

29. Now you should be able to build, flash and debug your Embedded Wizard application with the new STM32CubeIDE.
Hopefully this guide will help all STM32CubeIDE user until we will support this IDE with a predefined project.
Please also note that we do not guarantee for any correctness due to the reasons that STM32CubeIDE is not a part of our test process at the moment.
Best regards
Tim Zierer